Avonlea Tea

anne.tea.party.4

The beautiful weather compelled me to give you a Spring-themed wedding post.

I have always been enamored with the Anne of Green Gables movies.  Anne has long been the heroine of my heart and I knew that I had to throw an Avolnea Tea Party for my bosom friends who were to become my bridesmaids.

I gifted each of them with an antique tea trio that I purchased from Nancy’s Tea Shop. Rachel, the owner, has a killer blog all about the history of the teacups she finds across the pond.  It is drool-worthy stuff.

From the handles of those delicate beauties I dangled tags reading “You’re my cup of tea. Be my maid?”

anne.tea.party2

Ironically, no tea was consumed that afternoon, only a delightful sangria–which looked just as pretty in our delicate cups and was a sweet tribute to Anne’s raspberry cordial fiasco.

anne.tea.party1

For a simple, low budget tea party that is pretty as punch, I recommend diving into friends’ attics and basements for the following items:
Embroidered Tea Towels

Floral Bed Sheets

Vintage Robes and Slips

Pretty Gloves

Umbrellas

Tea Pots

Books

Crocheted Doilies

Suitcases

Floral bed sheets tucked like slipcovers turned Margaritaville themed patio furniture into feminine, elegant statement pieces.

I’m sure my grandmother would cringe at the thought of me using her slips as a decoration, but they looked lovely dangling about.

There’s no need for table cloths if you have several tea towels to do the job.

Here’s the biggest secret: pull out all unnecessary furniture and decorations in the room you are using. That way the small table or two you decide to theme up and decorate will stand alone and look grand.

I hope all of my kindred spirits out there have a wonderful week and try a tea party of their very own.

xoxoxo

Rachel Eleanor

Have your print and eat it, too

 fish.prints.4

Last night I worked on fish prints!

Yes. Fishy fishy fish prints.

If you can get over your revulsion for handling dead fish, you can make some gorgeous prints.

Fish printing, or gyotaku, originated in Japan in the mid 1800’s when fisherman wanted to record their catches. Since then, it has evolved into its own art form.

If you are a tactile person who loves graphic nature prints, then this is the DIY for you.fish.prints.8

You will need:

Paint Brush

India Ink (not toxic, if you want to eat your fish afterwards!)

Paper (Preferably thin washi paper, but you can use any kind)

Dead fish

Paper Towels

Paper Bags/Trash Bags

Step 1: Cover the surface you will be working on with your paper bags or trash bags.fish.prints

Step 2: Take your fish (which should be gutted) and stuff it with paper towels so it won’t ooze. Gross I know.

fish.prints.2

Step 3: Place you fish on your work surface. Using your paint brush, apply a thin layer of ink to your entire fish. For a cool effect, don’t paint over the eye. You only need a very thin layer, you want to be able to see the texture of the fish scales. No globs.fish.prints.3

Step 4: Press your washi paper onto your fish. Press firmly and pat and give your fish a little fish massage, making the ink soak through.fish.prints.5

Step 5: Lift a corner and peek. If your print is too light, massage your fish a little more. Be sure to press the paper around the edges of the fish.fish.prints.7

Step 6: Lift paper and enjoy your fish print!

What I really want to know is which of you will be brave enough to cook your fish afterwards.  Send me a pic of your print and your meal!

xoxoxo

Rachel Eleanor

Listening to: Tam Lin by Anais Mitchell and Jefferson Hamer

Building Blocks of Charleston

charleston.blocks.1

This weekend I paid my first visit to Charleston. I was on a mission not only to drink in all the scenery, but to dig up some local handmade treasures.

What I found ended up having more of an international twist.

The friends I was traveling with knew I was on the hunt and sent me a mysterious text instructing me and my fiancée to head down Market Street.

“You’ll know it when you see it.” They said.

charleston.blocks.3

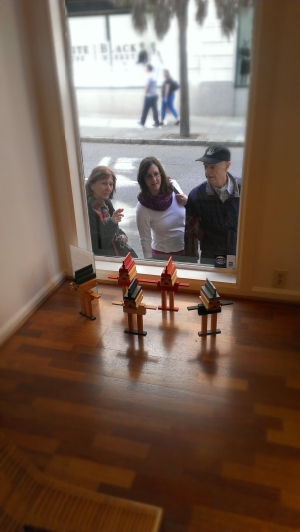
Intrigued, Cam and I moseyed back a few blocks, scanning store windows for handmade jewelry, or perhaps another vintage shop. When we saw the colorful-wood-plank-toy-filled windows of the KAPLA Store, we did not care if we were right or wrong. We had to go in.

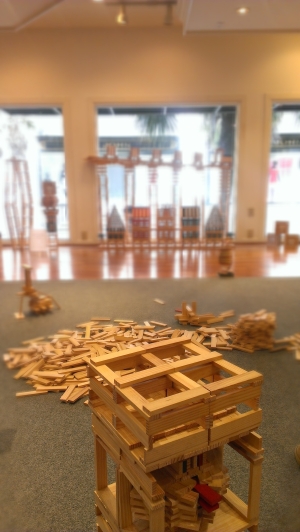
We walked up a short set of stairs into a quiet shop filled with the muted clacking noises of wood on wood. It smelled of pine. The sweet woman behind the counter welcomed us to the United States’ only KAPLA Store. She explained to us that all of the magical sculptures in the shop were made completely from small KAPLA planks and all but two were standing because of gravity and good engineering alone.

We were filled with awe. There was an Eiffel Tower, a lion, a clown and dozens of buildings. All were majestic tributes to physics, architecture, and engineering.

And they were pretty.

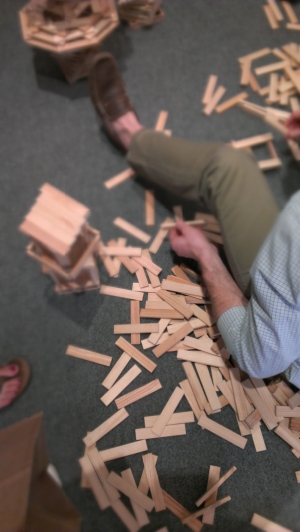
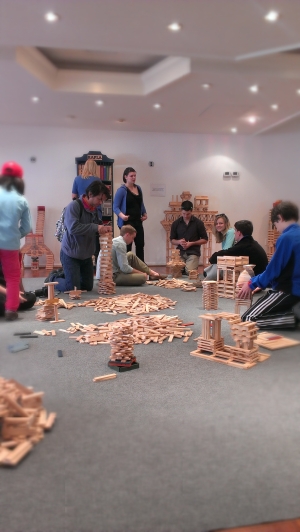
Then we turned to our left and saw a dozen of our friends seated cross-legged on the large grey rug in the center of the store, building alongside parents and their children.

charleston.blocks.4

There is something magical about watching engineers play with building blocks. We all shared a semi-silent, blissful half hour in the little shop. That is, until the very end when everyone knocked their creations over to the sound of clapping and cheers.

KAPLA blocks were invented in 1988 by Dutch art historian Tom Van der Bruggen when he was renovating a farm in France into a castle! He made a small scale model of his dream castle from planks of his own invention that followed a 1:3:5 ratio. He named them “Kabouter Plankjes,” meaning “gnome planks.” But he later abbreviated them to KAPLA. Cute origin story, am I right?

charleston.blocks.2

Well, it certainly wasn’t what I was expecting, but the KAPLA Store was my favorite gem in Charleston. I want to go back, especially because the store displays rotate on a weekly basis. My fiancée certainly wants to go back and stock up and asked if we could add them to our wedding registry. We’ll see how many crock pots we get first!

xoxoxo

-Rachel Eleanor

Winter Blues

IMG_2277 copy

A combination of schoolwork, two snow weeks and then these past few painfully beautiful days have given me the winter blues. Torturing myself with longing, I found my favorite summer treat: a fruit tart. It is one I deem “fancy” and save only for a special date with a friend. The fresh fruit of summer all laid out in a tart makes my mouth water, and I can almost feel the warm breeze blowing as I sit out on the patio of Highland Bakery, munching serenely.

Today I make due with eating an orange at a picnic table, writing to you.

I tried two tart recipes this summer at my engagement party, one from Allrecipes.com and one by Paula Deen. The group decided that we liked Allrecipe’s filling, but Paula Dean’s crust.

I love laying out sliced fruit in beautiful patterns, but my favorite part is pouring on the glaze at the end.

Scratch that.  My favorite part is eating it!

Scrounge up what fresh fruit you can find and give them both a try!

xoxoxo

Rachel Eleanor

No Skill Fruit Tart by Allrecipes.com

Fresh Fruit Tart by Paula Deen

Listening to Sun Giant by Fleet Foxes

A Round Tuit

cocoa.blog.2

This weekend, *nerd alert* I left for a Writing Center Conference in Greenville, NC.

What can I say, I love to tutor!

In addition to  learning several clever tutoring strategies, making new friends, and tasting my first eastern carolina barbecue, (way yummier than ours, by the way) I wrote until my fingers blistered and nearly fell off.

I found a round tuit.

I swore to myself, my professor and my friend that over the weekend I would complete my final draft for the book I am writing.

I was a woman possessed.

I scribbled feverishly for seven hours in the car there and back again–old school style–with a notebook and pen.

Back in my beloved ATL, I camped out in two separate coffee shops, carefully spacing out my caffeine intake so as to avoid

a) becoming a jittery mess and losing the ability to grasp a writing utensil

b) purchasing so many drinks that I became coffee poor

c) rushing to the bathroom nine billion times. Potty breaks throw off one’s groove. I really should purchase a shewee.

cocoa.blog

All this to say, you may congratulate me because today I am snowed in and converting all of my chicken scratch to one unified document. The world will soon be blessed with the fully-illustrated tale of a family of Polish cats that owns a bakery. I’m so excited!

I would really love to leave you with some practical tips or DIY that I learned from this experience, so let me give this a shot:

1) If you really need to get writing done, do it with a pen and paper. You will avoid internet distraction and the fatigue brought on by computer screen glare. You will also be able to write anywhere, without resenting patrons who intrepidly reached an outlet before you.

2) If you really need to get anything done, make an unbreakable vow to several people and assume that nothing but death will keep you from your purpose.

3) When writing, give yourself an instrumental soundtrack and sophisticated beverage. Each time I sat down to write I had either a coffee, tea, hot cocoa or glass of wine. Good flavors and inspiring music feed and pace your creativity.

I’m no expert, but I got work done.  I hope you do, to!

xoxoxo

Rachel Eleanor

Listening to: Usual Happiness by Kroke.

Just Pomodor-it

Image

During snowed-out ATL, I was separated from my beloved laptop for several days. When I finally had it back in my posession, I had a LOT of work to catch up on.

I’m sure you are familiar with this inner diaglogue:

“Time to complete my to-do list. Item number one. Oh, wait, email! Wait. Oops! Gotta answer this text! Which reminds me, I really need to get up and preheat the oven, oh I need a snack….let me check my facebook, oh no! What was I doing again?!”

Each time you try to resettle yourself into the task at hand, you are more frantic, more exasperated, and more scatter-brained.

Fear not! I have a solution!

It is called the Pomodoro Technique.

No, you don’t eat tomatoes to increase your concentration.

Please, check out the official website for an adorable video about guarding your time and getting stuff done.

In a nutshell, (or a pomodoro?) the technique is a simple process of using a timer to accomplish tasks in twenty-five minute intervals with five minute breaks in between each “Pomodoro.” After you have completed four pomodoros, you get a longer break.

It sounds deceptively simple. And it is. The key is making the time within your pomodoro sacred. I use an app for my android that runs a pomodoro timer. If I attempt to open any program other than the pomodoro, the timer stops. The technique makes you give twenty-five unadulterated minutes to the task in front of you.

When was the last time you didn’t multi-task? It’s incredibly freeing. I get tasks done one at a time in order of their importance and don’t get burned out trying to finish tasks in three hour marathons.

I made you a free printable with a phrase that I coined for my fellow pomodoro converts: “Just Pomodor-it!”

Watch the video and try out the technique. It really does work!xoxoxo

Rachel Eleanor

Listening to To Build a Home by Cinematic Orchestra.

Linocut Love

linocut.7

Good afternoon, friends!

This week I have a linocut D.I.Y. for you.

What is linocut, you ask?

Well, gather round because I’m going to give you some fun facts and instruction that will make you the toast of every coffeehouse conversation and cocktail party. You will sound très sophisticated!

Linocut is a printmaking technique in which you cut into a linoleum block to make a relief. You coat the un-carved surface with ink and then transfer the image to whatever surface onto which you are printing.

Linocuts look and feel a lot like the rubber stamps you may be used to.  However, with linocuts, you tend to press the paper to the linocut rather than the reverse.

Linocuts are fantastic for any sort of simple multiple printing you might like to do.  I, for one, will be making about a zillion napkins, place mats and maybe even some thank you cards using this technique.  It’s cheap, fairly easy and way fun.

On to the step-by-step tutorial!

Here are the tools you will need:

linocut.1

x-acto knife or linocut carving tools

linoleum block

light colored pen

dark colored pen

ink pad

paper

spoon

Instructions:

linocut.2

Step 1: Get out your linocut block and a light colored pen.  I used a pink sharpie pen.  Sketch out your design.  Starting with a light pen lets you make some mistakes before coming back in and using a dark one.

linocut.3

Step 2: Sketch your final design over your original with a dark pen.  I used a black marker.  Fill in all the spaces that you will be cutting out, so that you have a handy guide that will keep your from cutting too far into your image.

linocut.4

Step 3: Using an exact-o or a fancy pants carving tool, cut out all of your colored-in space.  Try to cut into the linoleum at a consistent depth.  You do not need to go super-deep.

linocut.6

Step 4: Your block should look something like this when you are finished.  See? Not super pretty or neat.  Nothing fancy.

IMG_5642

Step 5: Apply ink to your block.  You can use an ink pad or be a legit printmaker and use a brayer.  This step is a great testing point to see if you did not cut deeply enough in your negative space.  See where there are little speckles of ink in the background? I need to cut those spaces away.

linocut.9

Step 6: Remember those crayon rubbings you did back in elementary school? Same deal-io.  Place your paper onto the block and then rub the surface of the paper with the back of a spoon.  When you are finished, lift away your paper to see your printed image! Be sure not to let your paper slide, or you will end up with a 16-tentacled octo-oops like me!

That’s all there is to it! If you find you really love linocuts, you can get a special linocut press that will eliminate the need for the spoon-rubbing technique and will allow you to get consistently-aligned prints for multiples.

Try to start with a simple design, and then get more creative like these artists did:

Anatomical Heart Pillow by Horse and Hare

Red Bird with Flowers by Amelia Herbertson

Try it out at home and show us your results!

xoxoxo

Rachel Eleanor

Listening to Dinah by Bin Crosby

Enough is Enough

Things. So many things. I am always caught between having too many, and longing for more.

I think that sometimes we combat boredom or hopelessness with a search for novelty. New pretty things to have, to touch, to hold, to admire.

I try never to go onto Pinterest without a specific reason, lest the tide of little frivolities drag me far, far away from usefulness and especially far from contentment.

Recently, I read something that reminded me of the importance of gratitude. How we will always chase, and ache, and never be satisfied until we begin to be genuinely content with our present circumstances.

“Gratitude turns what we have into enough.”

—–Melody Beattie

earwarmers

Today I am grateful for three useful and beautiful sets of knit ear warmers. Each was a gift from a different kind friend who had heard me mention longing for a pair. Each was a surprise that arrived after Christmas, and each has kept my ears snuggly warm and my bad hair days looking fabulous.

And as for all the items I am not actively grateful for—those I need to chuck before I move into my closet-sized apartment in May!

Throughout my purge of possessions I have marched forward through my sentimental fog with this William Morris quote, “Have nothing in your house that you do not know to be useful, or believe to be beautiful.”

So with these reminders of being grateful for what I have (to prevent new stockpiling), and a hearty calling to cast aside objects that aren’t personally meaningful or helpful to me, I am able to move towards the future feeling a little lighter, and a great deal more joyful.

xoxoxo

Rachel Eleanor

Listening to: Pennies from Heaven–Louis Prima

Cocoa Snafu: Two Recipes for You

cocoa.mishap

As the last hours of my holiday break were dwindling, and I teetered upon the yawning edge of my New Year’s Resolution—I decided to try out a new hot cocoa recipe.

If I’m flushing my body of sweets indefinitely, shouldn’t I go out with a bang?

I tried this recipe for homemade Italian-style hot cocoa (Cioccolata Calda) by Doughmesstic. I didn’t have a whisk or milk, and ended up substituting each with a fork and Almond Silk, respectively. The result was a brownie-batter-pudding mess that I forced myself to finish in forkfuls if only to cure myself of the desire for chocolate for a while. It was so rich that I just might get a few extra days of disgust in before the cravings return!

Please try out the recipe with real milk and a whisk and tell me how it tastes! But don’t torture me, by that point I’ll be off chocolate.

If you want a recipe that I have had actual success with, I offer you Mrs. Happy Homemaker’s slow cooker cocoa recipe. I made it last Christmas for a gingerbread party and it was a real crowd pleaser. I recommend substituting milk chocolate for semi-sweet chips so that no one goes into insulin shock. For additional fun, add Peppermint Schnapps!
– Rachel Eleanor

Links: Cioccolato Calda, Slow Cooker Cocoa

Listening to: Le festin by Camille